Click Here To Download
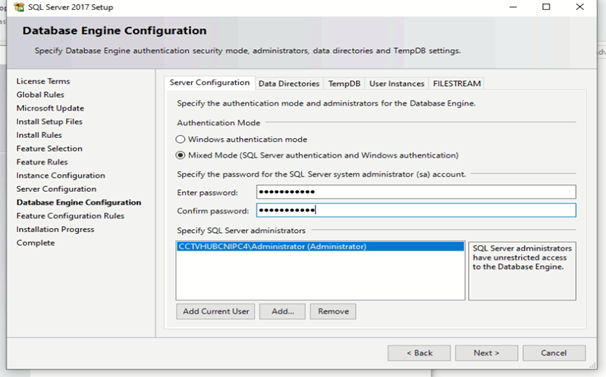
Select Custom installation and provide a Password for SQL(Default username is sa) as below.
Click here Refer more.
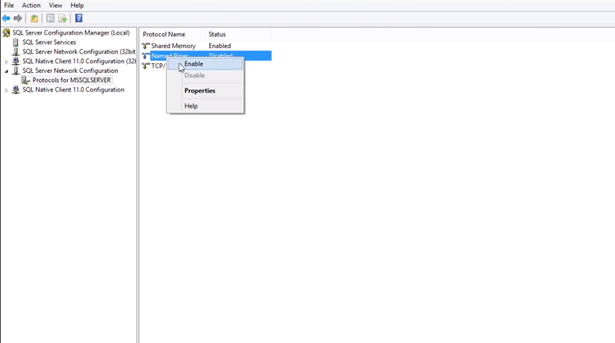
In SQL Server Configuration Manager, in the console pane, expand SQL Server Network Configuration. In the console pane, click Protocols for instance name

In the details pane, right-click TCP/IP to change, and then click Enable or Disable.
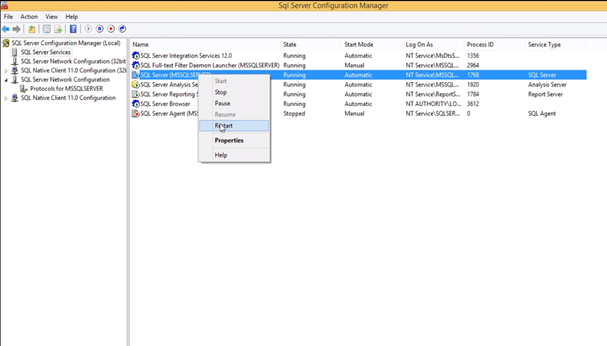
In the console pane, click SQL Server Services.
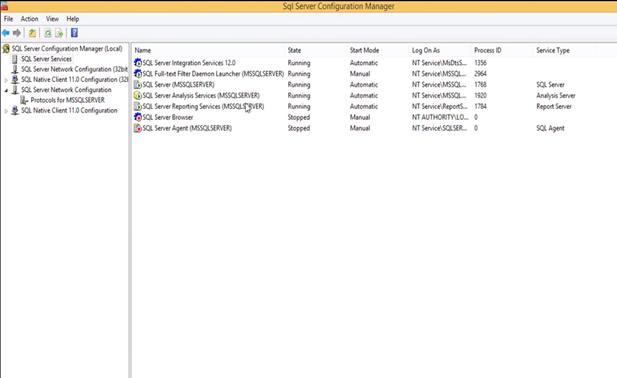
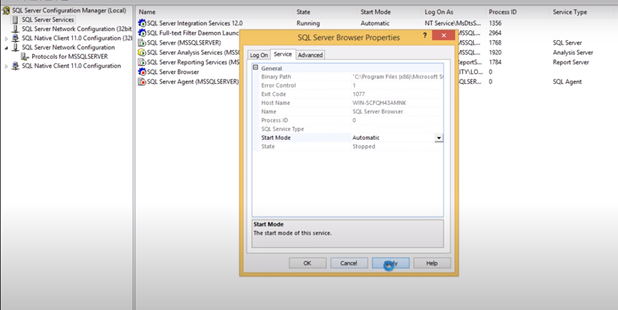
Select SQL server Browser-> Services-> Change start mode to automatic
After Starting SQL server browser by right clicking. In the details pane, right-click SQL Server (instance name), and then click Restart, to stop and restart the SQL Server service.
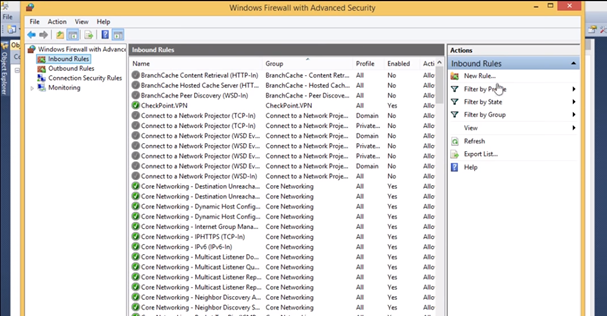
Go to Control panel -> Windows firewall-> Advanced settings-> Inbound rules -> New rule
Click here Refer more.
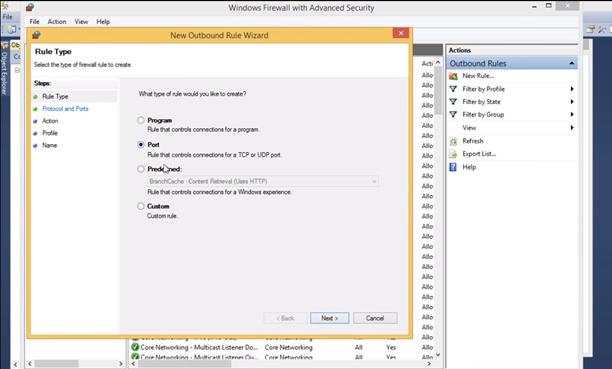
Select Port -> Next
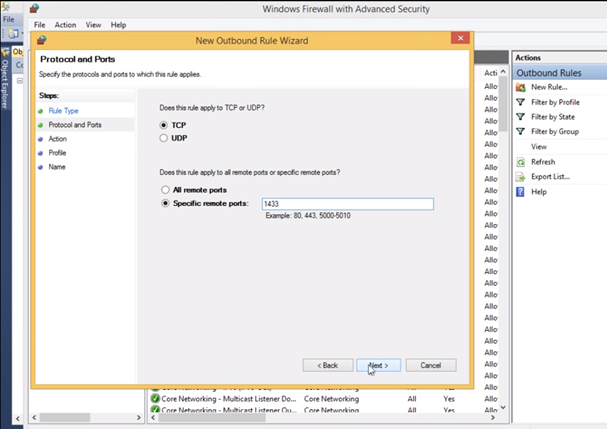
Provide Specific remote port as 1433
Click allow the connection -> Next -> Provide a name
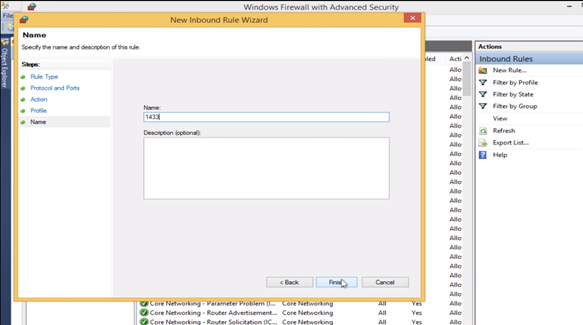
Inbound rule is now created
Create an Outbound rule in the similar way
Click here Refer more
The SQLEXPRESS is now able to connect via LAN
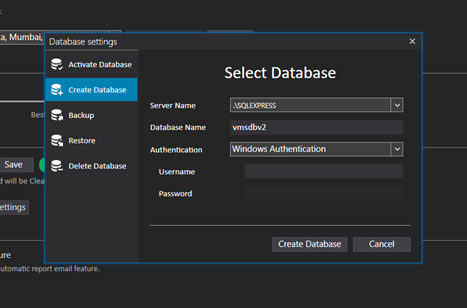
Open VMS->settings->general settings-> database settings -> Create database
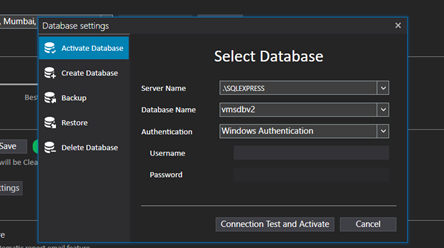
After creating database, in Activate database click on Connection Test and Activate
Database is now created as vmsdbv2 on SQL Installed PC
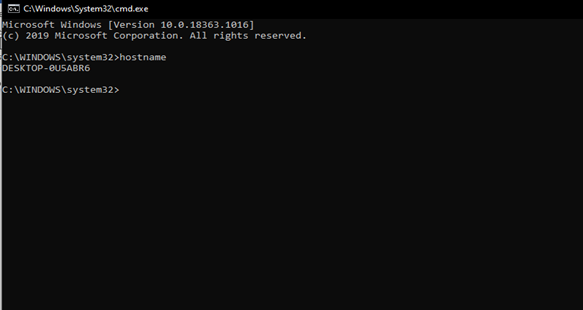
For Obtaining hostname of SQL installed PC
Open command prompt -> type 'hostname' then Enter
Click here Refer more
Open command prompt on non-SQL PC-> type 'ping hostname' and Enter
If pinging is working, Both PCs are connected.
If the step 2 fails (i.e., pinging failed from Non-SQL PC to SQL installed PC)
Open VMS->settings->general settings-> database settings
Provide server name as ‘hostname\SQLEXPRESS’
Select ‘SQL authentication’
Username and password
(Default username is ‘sa’)

After the Database name appears as 'vmsdbv2' click on 'connect test and activate'
Both devices VMS are now connected to one database of SQL installed PC.
If the Step 3 fails (i.e., unable to configure database from non-SQL PC)